How to Draw Your Floor Plan for Feng Shui
Every feng shui technique — the bagua, the flying stars, facing and sitting — starts from the same thing: a sketch of your home seen from above. You do not need drafting skill. A rough drawing on one sheet of paper, done in twenty minutes, is enough.
What you need
One sheet of paper (graph paper helps but is not required), a pencil, a tape measure or a phone measuring app if you want rough dimensions, and your compass reading. If you already have an estate agent's floor plan or a plan from your lease, use it as a starting point — but redraw it yourself, because the act of drawing teaches you the home's shape in a way that reading a plan does not.
Do one sketch per floor. A two-story home gets two sketches, both drawn with the same orientation, so you can compare them. Apartments get one sketch for the unit; note the building's main entrance separately if it differs from your door.
Step 1: Walk the home and note the shape
Walk through every room, including bathrooms, closets, hallways, and any balcony or utility space. Notice the overall outline: is the home a rectangle, an L, a U, or something stranger? Note where the walls jog in or out, and roughly how big each room is relative to the others. You do not need measurements yet — just the shape and the proportions.
Pay attention to two things beginners often miss. First, the thickness of the outer shape matters more than the inner walls: feng shui reads the home as a whole first, rooms second. Second, attached spaces count: a garage converted to a room, an enclosed balcony, or a conservatory is part of the home if it is used as living space.
Step 2: Draw the outline
On your paper, draw the outer shape of the home as seen from above. Keep it rough but honest: if the home is L-shaped, draw an L, not a rectangle. If one room juts out, show the jut. If there is a notch cut out of one corner, show the notch — that notch may be a missing area, and you will want to see it.
Then divide the outline into rooms. Draw the inner walls approximately, and label every room: bedroom, kitchen, bathroom, living room, hallway, closet. Mark the windows with a double line on the wall, and mark all doors with a small arc showing which way they swing. Door swing matters: a door that opens into a room changes the flow differently from one that opens into a hallway.
If you want rough scale, pace out the rooms: one normal adult pace is roughly 0.75 meters (2.5 feet). Count paces along each wall and note the numbers. This is not surveying; it is enough to keep a large living room large and a small bathroom small on paper.
Step 3: Mark the front door and the compass
Mark the front door clearly — a bold line, a label, an arrow. Use the door you actually enter through most often, the "mouth of qi," even if it is a side door. If the formal front door and the daily door differ, mark both and note which one you use.
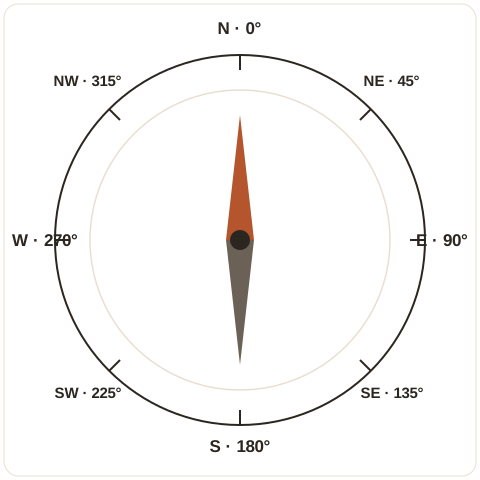
Now add compass directions. Take your compass reading at the front door, facing outward, and write the facing direction on the sketch — for example, "Facing 170° (South)." Then draw a small compass rose on the sketch, or simply write "N" with an arrow pointing the right way. Every later overlay depends on this: the bagua by compass, the flying stars, and the facing and sitting analysis all start from these marks.
Also mark the sitting direction — 180 degrees from facing — on the back wall. Two numbers, written on the sketch, anchor everything that follows.
Step 4: Overlay the bagua
With the sketch done, you can lay the bagua map over it. The beginner method is door-oriented: stand at the front door facing in, divide the sketch into nine equal sections (three rows of three), and line the bottom row up with the entrance wall. The bottom three areas — Knowledge, Career, Helpful People — sit along the entrance wall; the top three — Wealth, Fame, Love — sit at the far side.
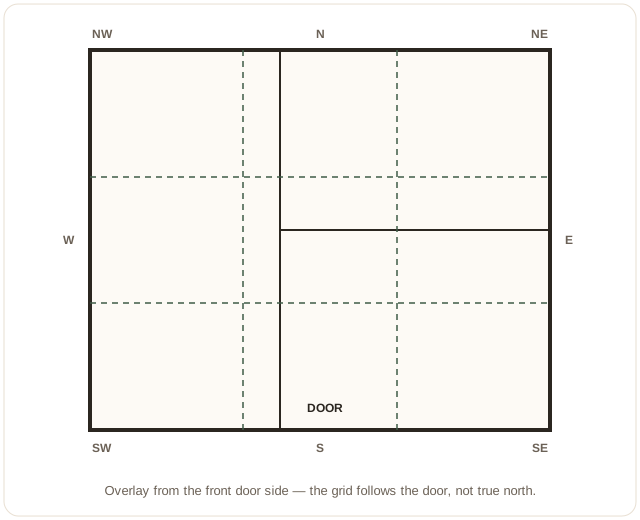
For the compass method, divide the sketch into eight sectors radiating from the center, aligned to your compass marks, with the center as the ninth area. This is the method that pairs with the annual flying stars: for 2027, for example, you would mark the North sector as the 5 Yellow sector and the Southeast as the 8 White sector, following the 2027 chart.
Whichever method you use, do it in pencil first. You will redraw the grid a few times before it sits right, and that is normal. The goal is not a beautiful map — it is a working map you can look at and immediately see which part of your home holds which life area.
Step 5: Read the sketch like a diagnosis
Now look at the finished sketch with fresh eyes and ask four questions:
- Where is the clutter? Mark the rooms or corners that accumulate stuff. Clutter on the sketch is usually clutter in the home, and it often sits in exactly the sector you most want to improve.
- Where are the missing areas? Draw the smallest rectangle that encloses your home's outline. Any part of that rectangle outside your walls is a missing area. Note which life area it corresponds to, and treat the nearest inside wall with extra light and care.
- Where are the extensions? Any part of your home sticking out beyond the enclosing rectangle is an extension — it emphasizes that sector. An extended wealth corner, for example, is traditionally read as a strong wealth area.
- Where are the problem rooms? A bathroom in the wealth corner, a kitchen in the love area, a staircase in the center — these are the classic "wrong room in the wrong sector" cases. Mark them. They are not disasters; they are the specific problems the room guides on this site address.
Write your observations on the sketch itself, in the margins. A floor plan covered in notes is a working document, not a mess. Date it, keep it somewhere accessible, and update it when you move furniture or renovate. It is the single most useful feng shui document you will ever make — and it cost one sheet of paper.
Common mistakes
Leaving out bathrooms and closets. Every space counts. A bathroom in an important sector changes the advice for that sector, so leaving it off hides real information.
Drawing the home as a rectangle when it is not. Forcing an L-shaped home into a rectangle erases the missing area — which is often the most informative feature of the whole sketch.
Forgetting the compass. A sketch without directions can only support the door-oriented bagua. Add the compass marks and the whole Compass School opens up.
Measuring instead of sketching. Beginners sometimes spend hours measuring and never finish. Rough proportions are enough. Start rough, refine later only if a specific technique demands it.
Once the sketch exists, the rest of feng shui gets easier. The bagua guide shows the nine areas in detail, the five elements guide explains the energy behind each sector, and the book pulls the whole method together with diagrams and a 7-day plan.
Go deeper with the book
Feng Shui Made Simple includes a step-by-step floor plan chapter with diagrams, the full bagua method, and a room-by-room walkthrough, plus a 7-day reset plan.
Frequently asked questions
Does my floor plan need to be accurate?
No. A rough sketch with the rooms in roughly the right places is enough for feng shui. What matters is the overall shape, the position of the front door, and the compass directions — not millimeter accuracy.
How do I handle multiple floors?
Draw one sketch per floor, all with the same orientation — north at the top, or your facing direction at the top, consistently. The bagua and the flying stars are laid out floor by floor.
What if my home is L-shaped or irregular?
Draw the true shape, then draw the smallest rectangle that encloses it. The parts of the rectangle outside your walls are missing areas; the parts of your home sticking out are extensions. Both are normal and both have simple treatments.
Should I include bathrooms and closets?
Yes. Every space counts, including bathrooms, closets, and hallways. A bathroom in an important sector changes the advice for that sector, so leaving it off the sketch hides real information.